In many cases you might be transferring a website from another hosting platform to one of the GetSpace's web hosting servers. This step-by-step guide provides you the instructions on how you can test the website functionality without making any changes to the domain's DNS records. You need to know the new IP address of the web hosting server. You can usually find this from the order confirmation email/details.
Step 1: Open Notepad as an Administrator
You’ll need administrator privileges for this operation.- Click the Windows button and type “notepad.” Let the search feature find the Notepad application.
- Right-click the Notepad app, then click Run as administrator.
- Windows User Account Control should pop up asking, “Do you want to allow this app to make changes to your device?” Click Yes.
Step 2: Open the Windows Hosts File
- In Notepad, click File> Open
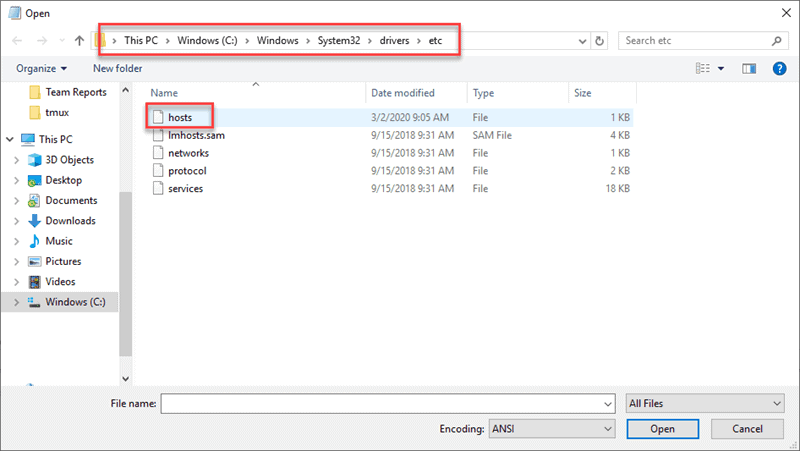
- Navigate to c:windowssystem32driversetc
- In the lower-right corner, just above the Open button, click the drop-down menu to change the file type to All Files.
- Select “hosts” and click Open.

Step 3: Edit the File
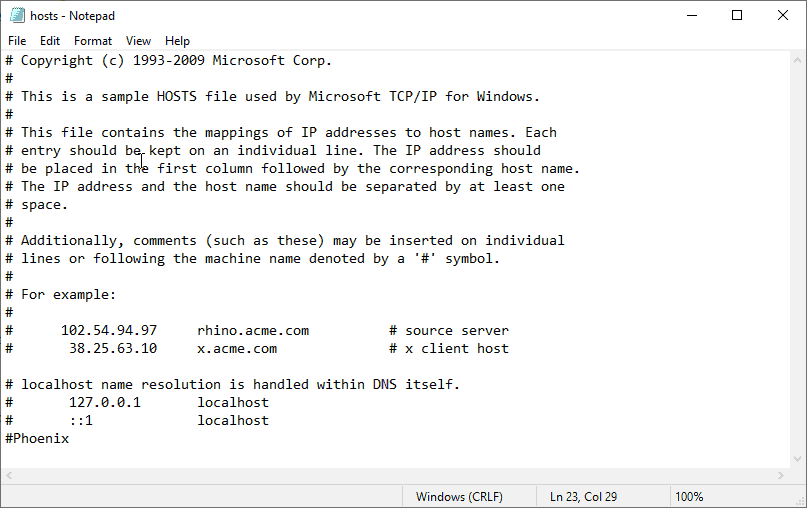
The Windows hosts file is that it gives you a brief explanation of how to write a new line. Here’s a brief breakdown:0.0.0.0 server.domain.comThe second label is the name you want to be able to type in a browser to access the server at the IP address you just specified.

Once you’re finished making your changes, save the file (File > Save) and exit.
If you make an edit to the hosts file and something stops working, you can tell Windows to ignore any line by putting a # sign at the beginning of that line.
It would look like:
# 0.0.0.0 server.domain.com


Add Comment